Image Slider

Showing posts with label how to. Show all posts
A no-buy, something that could be good for some or challenging for others. I've done a few no-buys over the time of being a beauty lover and I am currently on a year long one. I've figured out and learnt a few tips and tricks so I thought I'd share.
1. Make a makeup inventory
This tip is the most important in my option. You physically how much you own, how many products you have in each category etc.

I've put mine together via excel but you can do it in your bullet journal, word, a notebook or a follower of mine (Tanya) suggested an app: Momento.

Having a monthly tally will also help to keep you motivated as it will tell you how much you're actually using up, whether it is money-wise or the quantity in a certain category.

My previous blogpost is all about how to make a makeup inventory!

2. Start off with a low-buy
Instead of going completely from frequent makeup purchases to none at all, consider taking baby steps. You could set a monthly or yearly makeup budget, whichever works for you. Or you could only purchase a new product for X amount of products you use up.

For me, I will only repurchase something if I run out of products in that category. For example, I only own two black mascaras so once they're used up or dried out I will allow myself to buy another one.

3. Set yourself challenges
If you're the type of person that likes challenges or setting goals with makeup then consider doing a pan that palette or project pan. There are heaps of types on youtube, there's project 10 pan, 18 by the end of 2018 and so on. You would have seen my intro to my first project pan a few weeks ago so,  I'm only picking a few products to see how I go.

A few of my favourite YouTubers that promote using the makeup you own:
Kelly
Elle
Samantha
Liv
Tash

I find binge watching these ladies (and a few others that pop up in recommendations), really helps me stay motivated to use what I own.

4. Don't give in to new releases (how?!)
This is sometimes easier said than done. However, Elle has a great video about FOMO (fear of missing out) which has really helped me not care for new releases. She makes a great point that those products will a) always be around, or b) if it's limited edition and you fall in love with it, you won't be able to repurchase it any way.

5. Shop your stash
Switch things up often, play around with your makeup to create new looks you haven't tried before.

Hopefully these tips are helpful, as well as the youtubers I have recommended. Let me know if you're giving a no-buy a go, if so, how long?
This year I finally put in the work to actually create an inventory for all my makeup and body/skin care. Today I will be sharing my tips and screenshots of my inventory so you can use it as a guide. I am hoping to create a downloadable pdf template but I'm not good with excel and conversions so it isn't included in today's post. Hopefully one day!!

Tip #1
Store it all in one excel document but use labels. For my inventory I split it into various categories - eyes, face, lips. I also personally included a tally and products i've used up. I will attach a screenshot to better explain my layout a bit later on.

Tip #2
Use similar headings for each category so it is easier to track and familiar to you. The headings I chose were:
Brand
Category
Colour
Price
Size
Notes - e.g. if it is a sample size or to make note of how much i've used
Uses - this is just for a personal experiment as I wanted to see how many uses it would take to hit pan
Total for category - if you're interested in tracking an overall price as well as the individual price

Tip #3
If using up makeup is something you're interested in tracking, I suggest you list all the eyeshadow shades in palettes individually. This way you will feel more encouraged when you notice you hit pan on a shade or use it up. It also gives you greater insight to how many shadows you actually own as one palette could have 12, 9 or so on.

Here is a look at how I've laid my inventory out. I decided to colour code because I am a visual person.

Tip #4
Highlight products you have either
a) hit pan on
b) plan to use up
This helps to make them stand out amongst all the other products and makes it a lot easier to track.

Tip #5
Categorise items by brand. Especially if you have multiple lip products but they're all 'NYX'. I just find that it simplifies things by having it listed in the same area. It is personal preference though, as having it randomly could work just as well.

Tip #6
Have a tally with an overall count of how many products you own per category. It is one thing to list everything all out and see what you actually own, but a tally simplifies that and helps you see what you may own too many of or, where your collection is lacking. So for me, my tally tells me I own majority of eyeshadows and lip products. This information will help me put off buying those items or it could work in reverse and draw your attention to areas where you have room to purchase more products to try.

Tip #7
Do regular tally check ins. This is just really insightful to show you what products you use up the fastest or if you happen to be doing a project pan etc. it is encouraging to see the numbers for each category drop.

I have decided to go with 3 month check ins for my tally. But you could really do monthly or even three a year, its up to you!

Tip #8
Track the overall price of your entire makeup collection. This could be daunting, especially if your collection is on the large side. However, as you use products up you will physically be able to see that you are using your moneys worth.

Tip #9
Have a tab for used up/decluttered products. This is another personal preference but I find it interesting to track almost all aspects of my makeup collection. I enjoy taking note of what I'm using up and whether I've enjoyed the product. Including a decluttered section is also eye opening as it shows what products aren't your type and it can help guide future purchasing decisions.

By including the date of when you declutter items can help tell you when you last went through your collection. Doing this regularly, as well as the tally check in will encourage you to "shop your stash" or even be aware of what you own.
In June 2017 I tasked myself with the challenge of making my own diary for 2018. I slowly worked on a bullet journal gathering inspiration from Pinterest and youTube. I wanted to share a few of my favourite pages as well as things I have included in my bullet journal to hopefully inspire you with yours or encourage you to try one out!
This post doesn't have much text as I wanted it to be sort of like a visual flip through, so enjoy😊

I have included a few cover pages, a sneak peak at how I've set up the days and a few extra logs I have incorporated.

Since it is my birthday week as I am writing this post I wanted something simple to write up yet helpful. I know I have done other how to's relating to photography: flatlay tips & tricks and how to take the perfect flatlay, but this post goes more into detail with the editing of photos.

It is no secret that to achieve the perfect white backdrop it not only comes down to good lighting but also a little tweaking via photoshop (or any editor your prefer). Over the time that I have had my Instagram, I've received multiple messages on how I actually edit my photos so here it is:

1. Take the photo
2. Launch photoshop and open the image you want to edit.

OPTIONAL: If the photo doesn't have an all white background already, paint around the edges with white. If your background is fine then skip this!

3. Adjust the brightness/contrast slightly to ensure colours don't alter too much.

4. Adjust the exposure to achieve an all over white backdrop.

5. This could be optional once again depending on how white your background got from the above steps. This is dependent on lighting. In this case there was still a difference between the white tones so I used paint to make it seamless.
6. Add the watermark and you're done!

I edit my photos using the desktop photoshop as all my pictures are taken with my Nikon D5100. The same steps could be applied to photo editing apps such as VSCO, photoshop app etc. I hope this was helpful and happy editing!
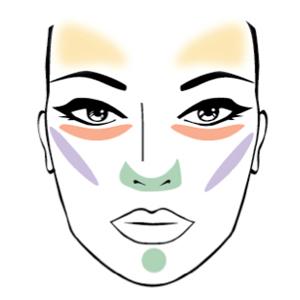
A few people have asked me how to best conceal birthmarks, redness, dark circles etc so I thought I'd put together a simple post to explain it. Although I am not a makeup artist I have dealt with most of these issues myself, so I do know a thing or two based off my own experience.
Related image


First things first, understanding the basic colour wheel:
The above image describes what each colour would generally be used for. Usually the colour opposite to the shade you are trying to "correct" is what you will use. For example, with redness you'd use a green concealer.

In this post I will address what I think are, the three main concerns people want to colour correct. Redness, dark circles and dull skin tones.

Redness/Acne

  • Yellow or Green concealer
  • Spot conceal
  • Apply before foundation/normal shade concealer
Personally for redness I reach for a yellow toned concealer, despite what the above image states you should use. As I am on the fairer side I find a yellow concealer is a lot more forgiving and works just as well. If you have a deeper skin tone I recommend using a green toned concealer.

Dark circles
  • Peach toned concealer
  • It can be applied after foundation
  • Follow with normal concealing and powder
My favourite corrector to use for my undereyes is the NYX Dark circle concealer.

Dull Skin Tone
If you are suffering from a dull complexion try a lavender or purple toned concealer/primer.

If you do not want to purchase colour correcting concealers or sticks you can opt for a primer. A number of brands make these such as Becca and NYX.

That brings me to the end of my post. Hopefully it was helpful and you're now able to colour correct anything you skin throws at you!
If you are one of my Instagram followers then you would have seen on my story two weeks ago my fabulous peeling eyelids and eye bags. I would like to take a moment to thank winter, the wind and me running out of all my skincare products at the same time for this. Let me tell you, dry flaky skin and makeup are not a match made in heaven, they are the complete opposite. No matter what you do the pesky dry patches will always be on show and when it is your eye area it does look quite odd.
I have a very, and I mean super, basic makeup routine that I stuck to during my time of struggle which still covered my acne scarring, let my skin breathe and didn't enhance any dryness. This routine consists of 4 products but you can alter it and add depending on your skin. Mine was just really dry so I kept it as simple as possible.

The first step is either a primer, oil or moisturiser. With my skin I went with rosehip oil to prep and really hydrate my skin. To actually cover my scarring and even out my skin tone I used the best concealer ever for dryer skin types! The BareMinerals bareSkin complete coverage serum concealer. Anything that is a serum generally works well with my dryer skin so I knew this concealer wouldn't enhance it. I spot concealed only the reddened areas of my face completely leaving out the eye area. I had to rock my natural eye bags for a few days and let them be coated with coconut oil to fix the flaking. This concealer provides amazing coverage and I will include a photo so you can all actually see what I mean.
The last two products that I used were mascara and a brow product. Mascara helped to make my eyes look awake and bigger since I couldn't actually cover any of the skin surrounding it with makeup. I only applied mascara on my top lashes (which I normally do anyway because I hate bottom mascara on me). I filled in my brows lightly and the look is complete.

Again, I know this isn't much and I probably didn't have to write a routine on it but it could help out someone else struggling with extremely dry skin. If you have dry under eyes then I also recommend this concealer because it has a hydrating formula and won't turn cakey. I hope this was helpful and thank you for reading this weeks post!
So, I did it. I finally sucked it up, purchased a derma roller and actually used it. Yes, I applied over 500 small needles on my face and I didn't even cry! Which is a big deal since I am usually terrified of needles.
If you've been following my Skin Diaries you would be aware that I am now left with numerous scars, mostly on my cheeks from acne, and no topical treatment was cutting it. I have done multiple peels and microdermabrasion in the past however those treatments had either a) too much downtime or b) were too expensive for a university student like me to keep up with. After a lot, and I mean A LOT of research, binge watching youtube videos and asking others who have tried it I decided to go with purchasing my very own torture device, the derma roller.

Ok, so it isn't actually that bad. The needles are so tiny and compact that you practically don't experience the sensation you are thinking. It is more ticklish rather than a painful, bloody, traumatic experience.

Purpose
If you suffer from acne scars, hair loss, fine lines, wrinkles, sun spots, hyper-pigmentation, large pores, cellulite or stretch marks then you too should be considering dermarolling. 

Dermarolling creates hundreds of tiny holes in your skin which tricks your body in thinking it has a wound to heal. This results in new tissue and collagen forming which ultimately helps fade scarring a lot quicker than normal. It is 100% safe as the needles are so small that you aren't creating any major damage. I will get into the different sizes in the next section.


Needle Sizes
The size I purchased was 0.5mm mainly because I was scared and also because my scarring isn't very deep, more so red. 
The needle sizes range from 0.2mm - 2.0mm and have multiple objectives. Please be aware that the larger the needle length the more painful it can be. Numbing cream may be required for the larger sizes and 2.5mm is not recommended or safe to use in your own home!

Depending on what results you are after I will include a table explaining what each length can be used for:
Based off my research any derma rollers larger than 1.0mm should never be used on your face (unless you're getting it done professionally). Sizes 0.2mm - 0.5mm only target the top layer of your skin (Epidermis), so mainly pores, pigmentation, wrinkles and shallower scars. As a general rule 0.75mm and 1.0mm are the most ideal as they are best for all skin conditions. The last group, 1.5mm and above, are better suited for treated skin issues on your body rather than your face. Also numbing cream is recommended whereas with the smaller needle lengths it is optional.


Routine
After countless nights of researching how often I should dermaroll, what products to use, how much downtime does it require, I came to the decision that I will do it every two to three weeks. This way I am able to let my skin heal between treatments and slowly build up to either a longer needle or frequent treatments.

Before dermarolling it is important you don't have active acne or other skin issues such as cold sores/cuts as you don't want to spread bacteria and cause infection. After all you are creating small punctures into your skin and those same needles will be going across the entire area you are treating. However, if you do have any pimples at the time of treatment you will avoid that area completely to prevent possible breakouts or infection.

Ok now actually how to use the device. You want to make sure your skin is clean before starting your treatment and you also want to make sure the dermaroller is sterilised with rubbing alcohol and has run under hot water for a few seconds. I chose to avoid exfoliating prior to use and stuck to a gentle cleanser instead, just so I wouldn't irritate my skin. The next part I wasn't entirely sure about as some sites suggested to apply a serum then dermaroll whereas others say to apply the serum once the treatment was complete. For my first time I went in with the derma roller immediately after cleansing my face.
Now for the fun part! When you are ready to roll across your face work in sections. I started on my cheek and while stretching my skin with one (clean) hand I rolled horizontally, vertically and diagonally roughly 8-10 times each. Picking it up after each stoke as dragging the roller across your skin can actually damage it. I then moved onto my other cheek, forehead, chin etc and repeated the process.

After all the rolling is done and dusted I applied my serum. The one I used is the Stem Organics Hydrating Face Fluid. Another point I wanted to quickly add is in some reviews I read said to apply vitamin C serum after treatment and others said doing so would burn your skin. Please do your own research with this but I decided to keep it safe and use vitamin C serum between treatments instead.

That is pretty much it when it comes to my dermarolling routine, I kept it short and sweet. I did my treatment at night, roughly an hour before bed and avoided makeup and direct sunlight for 48 hours.

After every treatment make sure to properly sterilise your dermaroller by soaking it in rubbing alcohol for 20 minutes. Always leave it in its plastic casing when not in use and never share your dermaroller with anyone else as it is a needle. It is recommended to replace your dermaroller after 10 uses or once a month if you are using it more frequently.
Results
I have only tried it out once so I cannot comment on results as of yet but my skin did look healthier the next day. I also found any skincare products absorbed into my skin almost immediately the following morning which was amazing. I will be sure to update you in future Skin Diaries and will also be including before/after photos there so keep your eye out for it.

In terms of pain I felt nothing, in fact it felt like a soothing facial massage. It did not feel like needles puncturing my skin at all and pinching your arm is more painful than dermarolling. After treatment my face felt itchy and looked a little pink.  For someone that hates needles I actually cannot wait for my next treatment!

Hopefully this review/guide was informative and helpful. If you have any other questions don't hesitate to comment below or contact me via Instagram DM and I will try to answer them as best as I can.


Where to purchase
I purchased mine via eBay - just search dermarollers. This was the most ideal and affordable option for me. You can also find them on banish, amazon, skin clinics and online.

Disclaimer: All opinions and information provided are based off my own individual research and experience. I am not an expert when it comes to skincare and please make sure to conduct your own extra research if you are interested in trying out dermarolling.
Happy New Year everyone! I am kicking 2017 off with more of a health type of post. Skincare starts from the inside out and it took me a long time to realise that. In 2016 I was really into making my own fruit juices and smoothies combining ingredients that help to improve the state of your skin. Today I will be sharing a few of the blends I love as well as the benefits of each ingredient. I won't be including quantities as you can make as much or as little as you like however for these juices to work to full effect drink them immediately rather than letting them sit.
The All Rounder
What you need:
-Spinach leaves
-Kale leaves
-Watermelon
-Pear
-Red apple
Optional - fresh ginger

How it helps: 
Spinach- is rich in chlorophyll. Therefore it helps to rid your body from bacteria and toxins in your digestive tract and blood stream.
Kale- full of vitamin A, C and K. It helps with repairing the tissues underneath your skin and can even help diminish dark circles!
Watermelon- helps with dehydration, rich in vitamin A, C and antioxidants which helps improves health. Aids with fine lines and age spots.
Pear- full of fibre and help slow the release of sugar into your blood which prevents too many sugar spikes.
Red apple- have the potential to lighten, brighten and soothe irritated/reddened skin. Will keep your skin looking youthful!

The Quick Option
What you need:
-Frozen berries
-Frozen mango
-Coconut water

How it helps:
Berries- high in antioxidants, reduce inflammation and help achieve radiant skin.
Mango- makes your skin glow and has anti-aging benefits.
Coconut water- promotes elasticity, protects your skin against sun damage and prevents dry skin.

Sweet & Refreshing with a touch of spice
What you need:
-Watermelon
-Strawberries
-Pear
-Carrot
-Ginger

How it helps:
Strawberries- are full of vitamin C which fights off radicals that steal oxygen from healthy cells and destroy collagen. Also contain folic acid which aids cell regeneration and they remove excess oil from your skin which = less sebum build up!
Carrot-  rich in vitamin A which helps fight acne faster.
Ginger- rejuvenates your skin as it contains roughly 40 antioxidant properties that prevent ageing and damage. Also evens skin tone and improves elasticity.

Websites used to gather information -
http://food.allwomenstalk.com/foods-that-naturally-prevent-and-treat-acne
http://www.stylecraze.com/articles/amazing-benefits-of-kale/
http://www.stylecraze.com/articles/benefits-of-watermelon-for-skin-hair-and-health/
http://www.stylecraze.com/articles/top-10-health-benefits-of-apples/
http://www.joybauer.com/food-articles/berries/
http://www.stylecraze.com/articles/health-benefits-of-mangoes/
http://www.livestrong.com/article/465098-what-are-the-benefits-of-coconut-water-for-the-skin/
http://www.byrdie.com.au/benefits-of-ginger/slide3
https://bellatory.com/skin/Top-5-Benefits-of-Strawberry-for-Skin
Welcome to my first skincare post in August! Even though there is only one month on winter left we can't forget to properly care for our skin. The cold weather may have taken a toll on your skin leaving it dry, dehydrated and dull. This weeks post will include a bunch of tips and products I suggest to use to combat any issues you are experiencing.

The first tip (which I personally struggle to give up) is to avoid hot water. A lot of people probably turn the heat up in the showers because its cold but this can actually dry out your skin (and your hair!). Try to keep your showers at a warm water temperature to allow your skin to keep its natural oils and still hydrated. This is such a simple change that can provide you with amazing results!

Provide extra hydration to your skin - three products I recommend to achieve this is either a hydrating face mask such as the Origins Drink Up Intensive Overnight Mask, a facial oil such as Rosehip oil or Jojoba oil and last but not least the Boots Laboratories Optiva Nourishing Night Cream

I just wanted to include a short review of the Optiva range products throughout this post to give you all an idea on how they worked for me rather than just slotting in products with the different tips. The nourishing night cream is a thick, but not heavy, moisturiser which absorbs quickly into the cream without the greasy and sticky feeling. In the morning my skin did not have that tight feeling which you may be familiar with if you suffer from dry/dehydrated skin. I believe this night cream is suitable for all skin types as it is not too heavy or oily feeling.
In terms of cleansing in the winter-time opt for a creamier or hydrating cleanser rather than a foaming cleanser which can strip your skin. Three cleansers which I notice to be the most beneficial and are all 2-in-1 products include: LUSH Ultrabland Cleanser, BL Optiva Skin Balancing Cleanser and Palmer's Ultra Gentle Facial Cleansing Oil. All three cleansers are either creamy or in Palmer's case, an oil cleanser, which gently remove makeup as well as leaving your skin clean without stripping any natural oils. 

The Skin Balancing Cleanser is a thin, liquidy cream cleanser which is so gentle when you are working it onto your skin. I used this cleanser with my Clarisonic and my hands and both methods left my skin feeling soft and hydrated. This cleanser is suited to normal to combination and dry skin types.

Use SPF! Most people avoid using SPF in winter since the sun generally isn't out, however it is important to be protected all year round! My favourite ways to incorporate SPF in my winter skincare routine is to use moisturisers that have SPF within them. My two favourites that don't irritate my sensitive skin at all are Antipodes Immortal SPF 15 Face & Body Moisturiser and BL Optiva Daily Protecting Cream (suitable for oily and combination skin) or their Comforting Day Cream

The Boots Laboratories moisturisers also contain SPF 15. They have a lightweight formula that provides the hydration your skin needs. These moisturisers also work well under makeup!

Last but most importantly is to drink 2L of water each day. You have probably heard this tip a lot but it really does help the most. You can apply as many creams and cleansers to your skin but if you are not internally hydrated your skin will still show it! I find that keeping a water bottle with me at all times helps to encourage me to drink water. When you are hydrated it also will reduce puffy eyes, fine lines and any dullness your skin may have.

That brings me to the end of my Banish Dry Winter Skin post and if you are interested in any of the products mentioned just click the links! If you are specifically interested in the Boots Laboratories range here is more information:
The Boots Laboratories Optiva range can be purchased from Amcal or Guardian Pharmacies. Prices range from $14 - $22 (AUD) so you can combat your dry, dehydrated skin at an affordable price!
Disclaimer - this post was in collaboration with Boots Laboratories as they sent me products to trial and include in this post. Opinions are 100% truthful and my own. I only included products in this post that I actually notice to improve my dry skin and I did use the Optiva range for 3 weeks prior to writing this post up. I would just like to thank both Jade and Boots Laboratories very much for giving me this opportunity.
Since A Beginners Guide: How To Take The Perfect Flatlay is continuously my most viewed and most popular post I thought I would do an updated one. To read my first post regarding flatlays click here

My first post was more focused on how to edit the image to get the perfect white backdrop and lighting so today I will touch on props, enhancing the colours in the image and any other tips I think of along the way. These tips can be used for pretty much any sort of flatlay and are perfect for blogposts or your Instagram feed!

1. Pick a theme
You want your flatlay to be cohesive and have a certain theme to the image. Whether it be a certain brand you want to feature or you wish to play up a certain colour. This tip can make your flatlay look more visually appealing and catch the viewers attention.
2. Placement
How you place items is also key. Do you want your flaylay to feature one certain product? If so you could do a close up or blur any surrounding products to draw the attention to that specific item. You can have an organised mess or a scattered mess. An organised mess is those flatlays where all items are in line with one another and it looks very neat and clean otherwise a scattered mess is exactly as the name suggests. You can also take your flatlays on an angle, centre the items or have them going diagonally across the image. It is really up to your own preferences and what look you are going for.


3. Props
This is the part where you really get to have fun with your flatlay!
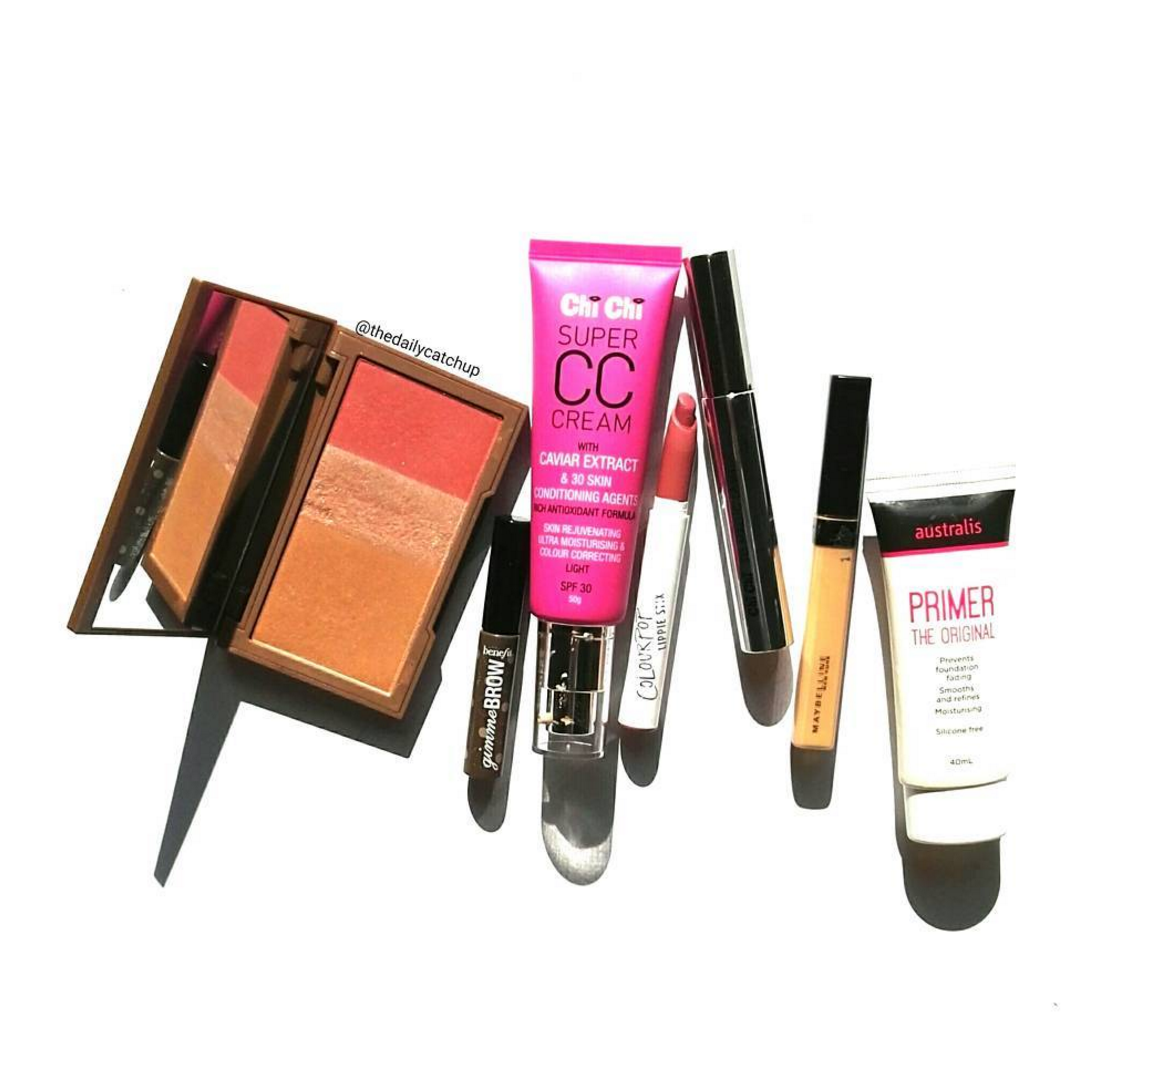
Paint sample cards from your local hardware store, such as Bunnings, is an easy way to add a pop of colour to your images. Alternative props you can use are coloured paper, brushes, phone cases, flowers, plates, lollies, chocolate or chopping boards. Anything really! You can really get creative with your pictures and make them unique.


4. Enhancing colours and contrast
If your flatlay is looking a little dull play around with the saturation when you are editing your image. This will enhance the colours and make everything look a lot brighter.

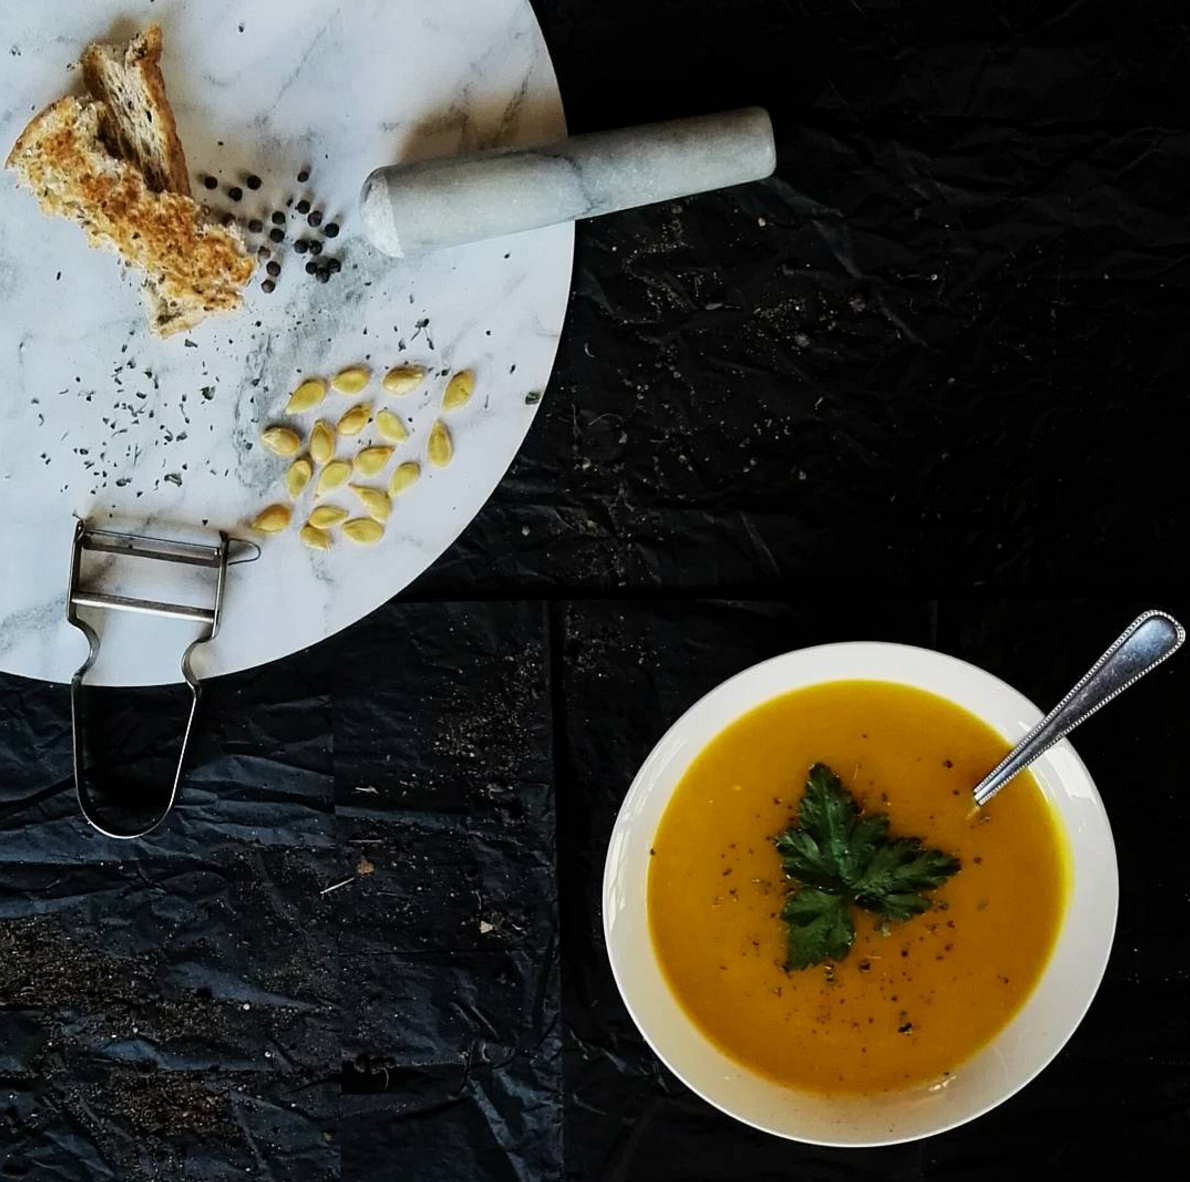
You can also create a contrast with your flatlay, for example contrasting grey or white against a black backdrop and vice versa. I've started playing around with food flatlays lately so I thought I would include those as my examples for this tip.

I hope these tips help you out and are useful to you. If you have any questions please leave a comment below or on my Instagram. Happy flatlaying!
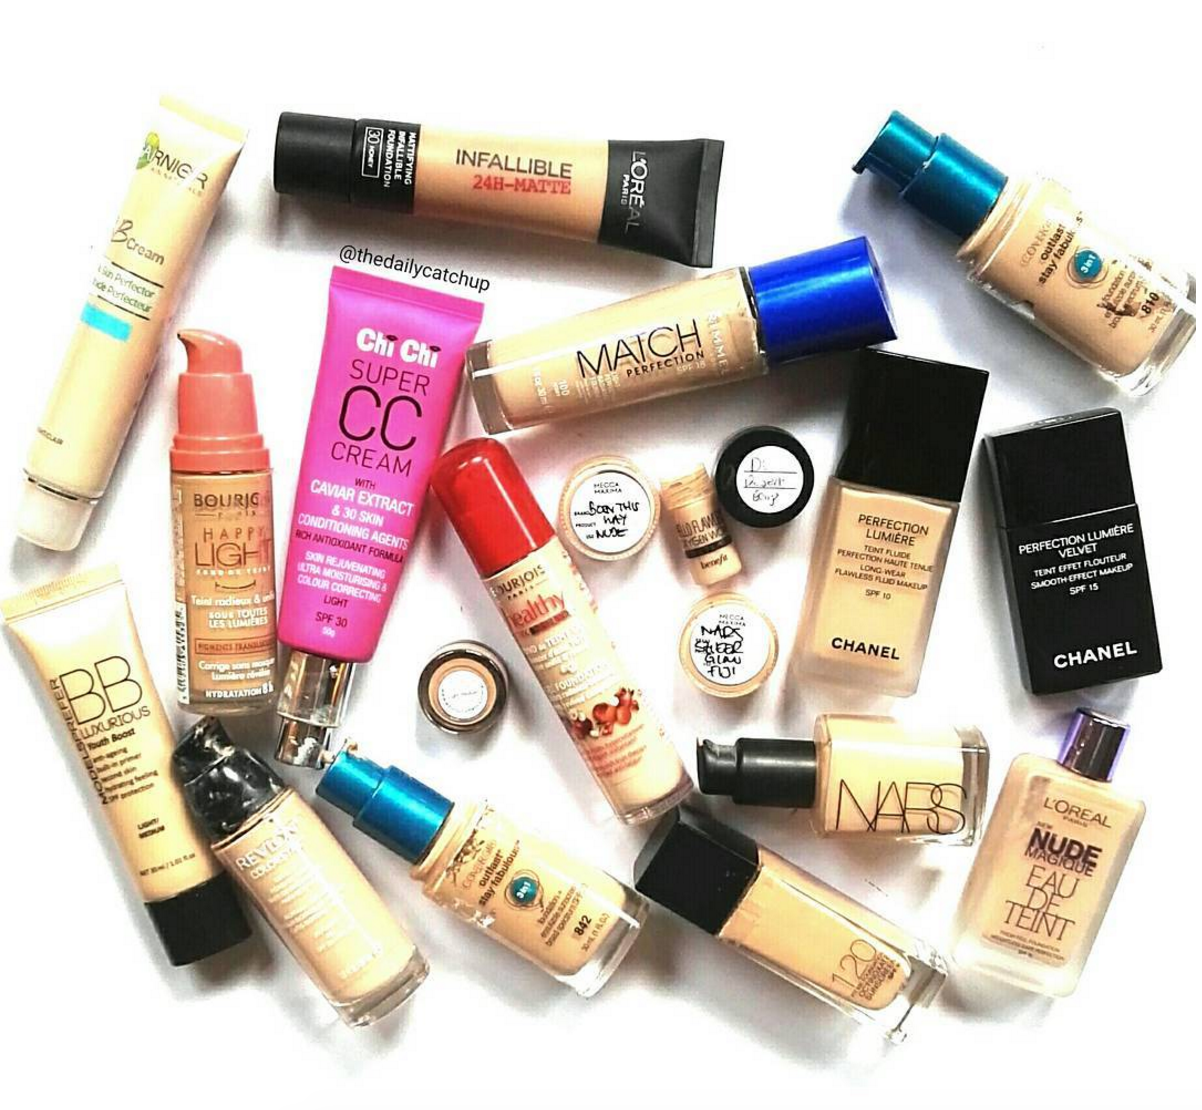
There are so many foundations on the market and it can be a little overwhelming, especially if you're a beginner, to choose between powder, liquid or creams etc. I have put together this general guide to help you understand which type works best with each skin type or finish you desire.
Powder
Most suitable for: Oily skin

Description: This can either come in a pressed or loose form. Generally powder foundations give less coverage (pressed generally have fuller coverage!) and are often used to set a liquid foundation. However opting for a powder foundation results in natural coverage which is easy to apply daily.
How to apply: Use a kabuki or powder brush to apply.

Tips & Recommendations: 

  • If you are after fuller coverage use powder foundation to set your liquid foundation
  • Apply any liquid products prior to using powder
  • Apply in circular motions to properly buff it into your skin - preventing a powdery appearance
  • Set with a makeup setting spray to remove any powdery look your skin may have
Mousse
Most suitable for: Mature skin

Description: This foundation is whipped resulting in it being a smoother option for mature skin types. Since it is a mousse formula it generally does not settle into fine lines and covers most imperfections.

How to apply: Using your CLEAN fingertips or a buffing brush.

Tips & Recommendations: 
  • Start from the centre of your face and work your way outwards
  • Using a damp sponge can help add moisture into the foundation

Liquid
Most suitable for: Normal, oily, combination and dry skin

Description: Probably the most popular of them all; Liquid foundations comes in a variety of coverages and finishes so no matter what your skin type is you will be able to find a match. These foundations generally come in bottles with a pump or squeezy tubes. As mentioned previously they can come in different formulas so some may be thicker others will be thinner in consistency. As a general rule of thumb those with oily skin should use foundations with more of a matte finish in contrast to a dewy finish which is better suited for those with dryer skin.

How to apply: Liquid foundations can both be applied with a brush or beauty sponge.
Tips & Recommendations: 

  • Use a synthetic brush to apply so less product is absorbed
  • Wet the beauty sponge to get a more flawless and even coverage. This also reduces the amount of product the sponge will soak up and waste.
  • Start from the centre of your face and work your way out.
  • Set your liquid foundation with a translucent or coloured powder to ensure it will not move throughout the day. If you have really dry skin you may want to skip this.
  • Purchase a foundation with NO SPF if you are taking photos with flash. SPF tends to cause a white cast on your face making your face not match your body in photos.

Cushion
Most suitable for: Dull, normal or dry skin

Description: Originally popular and used is Asian countries, cushion foundations are becoming very popular in the widespread beauty world. This foundation is a liquid housed in a cushion compact which is very practical for on the go!

How to apply: With the sponge they come with.

Tips & Recommendations: 

  • Press/pat onto your skin
  • Wash the sponge it comes with weekly as it can be a great home to bacteria build up (yuck!)

Cream
Most suitable for: Dry, combination or oily skin

Description: Cream foundations can either come in a pot or stick form and provide medium to full coverage. Cream pots usually incorporate moisturising benefits for those with dryer skin types however stick forms are better suited for oilier skin types as they are more drying.
How to apply: With a brush or beauty sponge (image above for reference)

Tips & Recommendations: 

  • Use patting motions to apply
  • Less is more - if you need more coverage build it up on those areas with thin layers
  • Synthetic brushes work best
  • You can apply powder to set this type of foundation if needed.

Hopefully this post was helpful and you have a better understanding of the different types of foundations and which one suits you best! Thank you for reading :)